This is a recipe post written down for my children and grandchildren. I no longer can find the cooking post that first showed me how to use reserved fat and flour to make a roux. I wish I could, so I could give the cook credit. This is a quick post and assumes that you will look up anything you don't understand or call me.
But there are many others out there who have perfected the technique. This is my clumsy version for our family. Sometimes, I have to strain the gravy because of flour lumps, it doesn't happen that often, mostly because I think that if I keep my broth hot or at least warm, the roux blends in properly. But I'm not a perfect cook, sometimes I have to strain my gravy and keep going. This time, I added all my fresh herbs to the chicken in large pieces, sticks and all. You don't have to do that, just any dried herbs and salt and pepper will be enough. Or no herbs and whatever spices you want.
Put your pieces of chicken in a baking dish, add any spices or salt, then put into a hot oven around 375F and bake for a few minutes to get the chicken juices to run.
Here the chicken (thighs with skin) juices are starting to run. Add a spoonful of butter and let it melt into the juices. Then use this mixture to baste the chicken with until skin is crispy and brown at the end of the cooking time. I baste with a soup spoon and just scoop up the buttery juice by the spoonful and let it run over each piece of chicken. I do this every 15-20 minutes if I remember.
Here is the chicken fully cooked with crispy skin. I picked off most of the big pieces of herbs, but if you used regular dried herbs, you can skip that step. I probably baked this for 45 minutes, but you can use a meat thermometer if you're nervous.
So that's how you roast chicken in the drippings. Now to turn those drippings into gravy!
Here is my baking dish after I took out all the pieces of chicken. In the background, is my chicken bullion made from boiling water and adding powered bullion. I buy OXO brand for both chicken and beef. I like that flavor the best. I usually make about 4 cups of bullion and then decide if I need another cup after the gravy is boiling and thickening.
This is the process I use to strain my drippings into my gravy separator. I use my mesh strainer balanced over the opening of the separator usually sitting in my sink in case I spill. If you don't feel confident doing this, just strain your drippings into a large glass measuring cup and then pour that into your gravy separator. I used a rubber spatula to scrape the sides of my baking dish to get all the good flavor bits into the juice. Then I carefully scraped it into my mesh strainer to keep it as pure as I can. But if bits of herb get through, that's okay. It will just add some color to your gravy.
Already you can see how the juicy broth settles to the bottom and the fat sits on top. The gravy separator will allow you to pour off the broth and keep the fat from pouring out.
Here it is quite clear that the darker liquid on the bottom is the tasty broth you baked with and you will pour that off into the glass cup with your other broth made from chicken bullion.
So now I've poured off the broth from the gravy separator into the glass cup and left my fat behind. If you pour the broth carefully you should be able to get rid of most of your broth easily and stop when the color changes to fat. No worries if the broth takes some of the fat with it when you start pouring or as you finish.
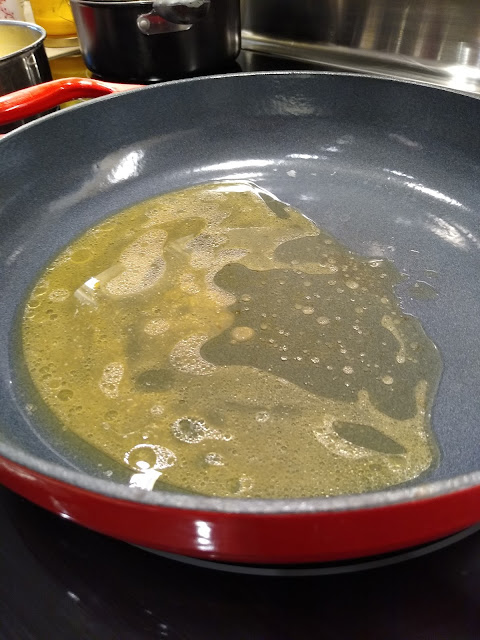
So into the large skillet goes the fat from the gravy separator. You can scrape the inside with your rubber scraper to get most of the liquid into the skillet. Turn on the heat and bring your fat to medium heat so that it starts to bubble. Once, it's bubbling, add the flour as seen next.
This is where I abandon all the cooking guides for fat to flour ratio. If you're good at following those ratios, then great. I guess-timate and generally add one tablespoon of flour to every tablespoon of fat I think is in my pan. For me, that's generally 3-4 tablespoons. No cooking guide will tell you to guess. I do but until you get comfortable doing this, perhaps looking in your cookbook about the fat to flour ratio will help you.
Here's what my skillet looks like with bubbling fat and measure flour before I start to whisk it together.
Here, it looks like I could have added one more tablespoon of flour, but I'd rather be a little runny than too stiff so I think it's good. The flour is almost mixed in.
So now I have whisked the flour into the medium heated fat and everything is bubbling and ready to add my broth.
The next few pictures look bland and boring as I add the broth and bring the gravy to boil.
But this is where the roux should be doing it's magic and thickening the gravy while bringing good flavor.
So while that simmers and thickens, let's look at our cooked potatoes. I've boiled them until the fork slides in gently and then drained the water off the pot using the lid to keep the potatoes in the pot. Then after I've turned the heat off the burner, I put the potatoes back on the burner and let the excess water in the potatoes evaporate and dry out a little. Don't let them sit too long and start to stick, but you can shake the pot a little and let them get bashed a up bit as they dry up nicely.
Then I take them off the heat, put a pad under them on my counter and start to mash them with my mixer beaters without turning the mixer on. You could use a potato masher, I just don't need to dirty that up when the beaters will do the same work.
Then I warm up in a small pan some milk and butter. I don't measure so these are approximate amounts: 1/2 cup of milk and two big spoonfuls of butter. I let that simmer on low heat for a minute or two until the butter is melting into the milk.
Then I pour this heated mixture into my bashed potatoes and then I use my electric mixture inside the pot to whip the potatoes until smooth and creamy. Taste and add salt and pepper to your liking. I leave the mashed potatoes in this pot to keep warm. If I was putting them into a serving bowl, I would warm the serving bowl and then add the potatoes.
Check in on your simmering gravy and if it tastes good, you're ready to serve. If you need to add salt or bullion powder to the gravy, you can do that and let it simmer longer. Then serve.
This is not my darkest gravy, but it does the trick.
So that's a quick explanation of how I make gravy after roasting meat. You can do this same process for anything that you want to have gravy for. If you're not making a gravy, save all the drippings into a container in the refrigerator or freezer for another day. The fat will be solid and easy to remove into your skillet. Or you can save the fat for making soup. Another post for that one.


No comments:
Post a Comment
I enjoy reading your comments and try to reply as much as I can. Thanks for reading here.